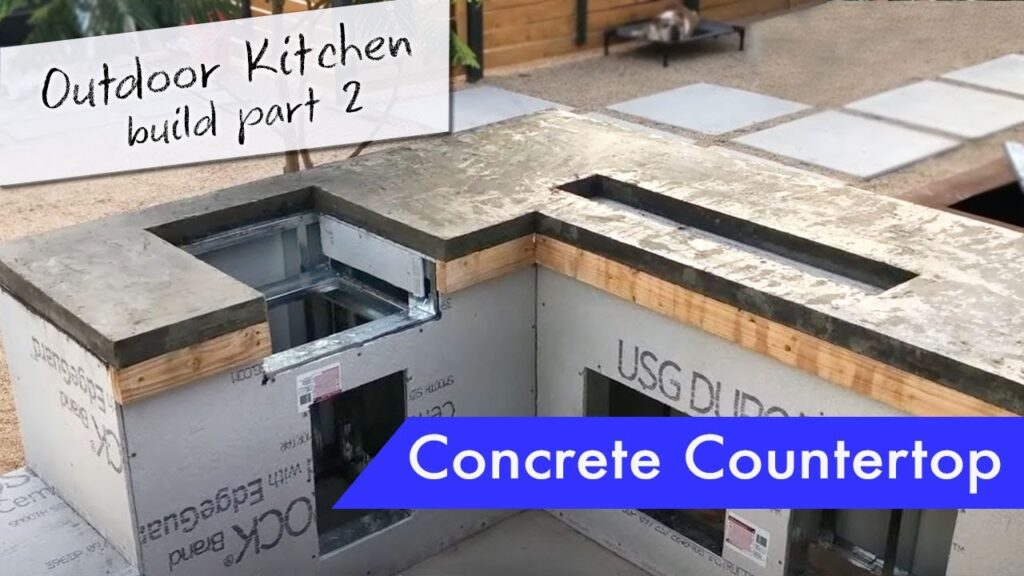
In the continuation of your outdoor kitchen journey, Shoestring Martha guides you through the process of forming, pouring, and finishing a concrete countertop. From discussing different concrete mixes to tackling hiccups during the pouring process, this video provides a glimpse into the DIY experience of creating a unique and industrial-looking kitchen feature. With detailed explanations and tips, you’ll learn about the challenges faced and how they were overcome, ultimately resulting in a satisfying end product that showcases character and charm.
By delving into the specifics of concrete forming, pouring, and finishing, you’ll gain insights into the intricate process of creating a custom concrete countertop for your outdoor kitchen. From the decision-making between different concrete mixes to the methods used to achieve the desired look, this video offers a firsthand account of the ups and downs of embarking on a concrete project. Whether you’re a first-timer or a seasoned DIY enthusiast, the shared experiences and lessons learned in this installment will inspire and guide you as you take on your own outdoor kitchen project.

Preparing and Building Forms for Concrete Countertop
When preparing and building forms for your concrete countertop, one of the first steps is attaching ledger boards for overhang. These ledger boards will act as the base for your countertop and overhang. Using self-tapping hex head lags, you can securely attach the ledger boards while ensuring a snug fit by countersinking the bolts. However, this may create additional challenges, so adjustments may be needed during the process.
Another important aspect is building the form for the drink trough. Since you want to mount the form to the top of the countertop, it is crucial to ensure that the form matches the thickness of the countertop, typically around two and a half inches. Additionally, pre-drilling holes and using bolts to secure the form in place will allow for easy removal once the concrete has set.
To hold the form boards securely around the perimeter, consider using corner braces to maintain a level edge. Sealing seams, joints, and holes with silicone is essential to prevent any leaks or seepage during the pouring process. Furthermore, adding supporting legs under the bar and setting up a system for expansion and extra weight will ensure the stability of your countertop.
Adding Reinforcement and Supporting Structure
To reinforce your concrete countertop, it is crucial to prepare and cut remesh pieces that will provide added strength and durability. Additionally, adding supporting legs under the bar will help distribute the weight evenly and prevent any sagging over time. Setting up a system for expansion and extra weight will help mitigate any potential issues once the countertop is in place.
Selecting and Mixing Concrete
When selecting concrete for your countertop, consider using Sakrete High Strength concrete for its affordability and durability. Calculating the water, color, and flow control ratios is essential to ensure the proper consistency of the concrete mix. While mixing, be mindful of the aggregate content and dryness of the mix, as this can affect the workability and finish of the countertop.
It is important to note the differences between countertop mix and high-strength concrete. While countertop mix may be easier to work with and provide a smoother finish, high-strength concrete offers strength and affordability. Choose the option that best suits your needs and budget for a successful concrete countertop project.
Pouring and Vibrating Concrete
When pouring the concrete mix into the form, ensure an even spread and use a sawzall to vibrate the form gently to remove any air bubbles. Pressing and skimming the surface with a trowel will help create a smooth and level finish. Be attentive to any voids, rough spots, or collapse that may occur during the pouring process, and address them promptly with a slurry mix to fill in gaps and uneven areas.

Finishing and Smoothing Concrete Surface
After pouring the concrete, inspect the surface for voids and rough spots that may need attention. Applying a slurry mix to fill voids and smooth out imperfections will give your countertop a polished appearance. Address any collapse or uneven areas to ensure a uniform and level surface for your finished concrete countertop.
Resolving Forming Challenges
Dealing with countersinking issues due to wood swelling or other challenges may require adjustments during the forming process. Consider using wider boards or drilling into studs for added support and stability. Ensure that your form is secure and level to prevent any issues with the pouring and setting of the concrete.

Cleaning and Final Touches
After the concrete has set, carefully remove the form to reveal your finished countertop. Apply a final sealant or finish to protect the surface and enhance its appearance. Cleaning any excess concrete and finishing touches will give your countertop a polished and professional look.
Troubleshooting and Tips for Future Projects
Learning from any mistakes or hiccups during the concrete countertop project will provide valuable insights for future projects. Consider recommendations and implement strategies for a smoother process in future endeavors. Reflect on the challenges faced and how they were resolved to improve your skills and expertise in concrete countertop forming.

Conclusion and Reflection
Assess the final result of your concrete countertop to evaluate its quality and appearance. Reflect on the lessons learned as first-timers in the concrete countertop forming process and consider how this experience can inform future projects. Celebrate the accomplishment of creating a unique and durable countertop that reflects your vision and creativity.
Additional Resources and Recommendations
Explore alternative concrete mixes and techniques for future projects. Consider seeking professional assistance for complex projects or specialized designs to ensure a successful outcome. Continuously expand your knowledge and skills in concrete countertop forming to enhance your craftsmanship and creativity.

